Connectivity check
The Check Connectivity tool lets you see graphically if your model is properly connected. For example, it will quickly tell you if a member simply passes over a node or if it is properly connected to it.
It runs in three different modes, each of which can be initiated as explained individually below, however you can also access them all by clicking the "Check Connectivity" button  on the top toolbar.
Once elements are highlighted by the "Check Connectivity" tool, they can also be selected by pressing ENTER.

Check connectivity
This mode requires you to right-click on a node, member or plate and then select "Check Connectivity" or "Check Connectivity" => "Connections" from the popup menu that appears. It will then find and highlight any nodes, members and plates directly connected to the item you selected. You can then click on any other node, member or plate to see what is connected to it.
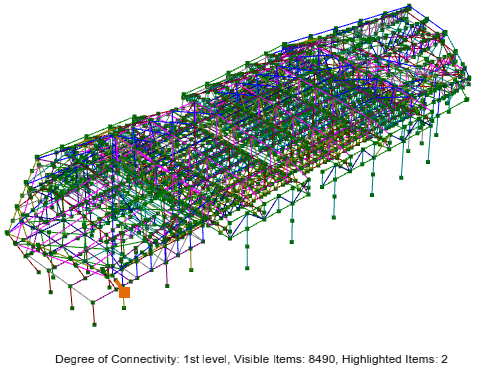
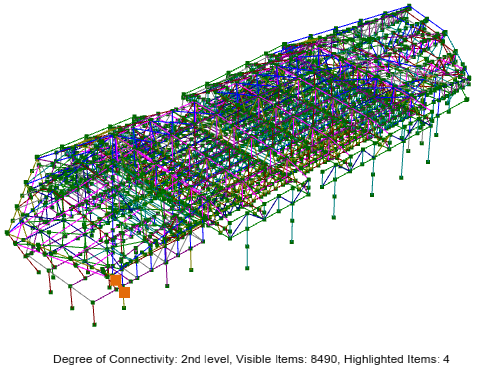
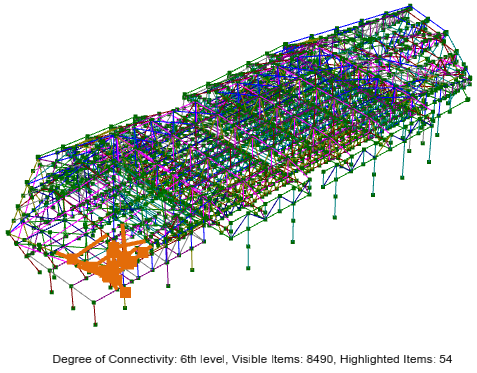
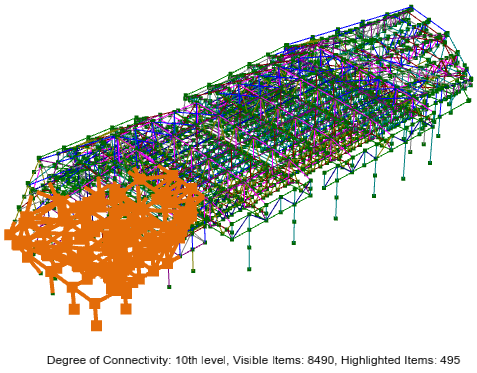
Alternatively, you can increase or decrease the degree of connectivity by using the up/down arrows on your keyboard. A level 1 degree of connectivity will highlight just the items that are directly connected to the selected item, whereas a level 2 degree of connectivity will also highlight the items that are connected to the level 1 items, etc. If you choose a level 0 degree of connectivity then it will keep expanding the search until it finds no more connected items.
For example, clicking on a member with a level 1 degree of connectivity results in the following.
Using the up arrow key to progressively expand the connectivity search out to 2, 6 and 10 levels results in the following.
You can also use the down arrow key to go back down the levels.
It then becomes easy to isolate any items that don't get highlighted as part of the connectivity checking. If they are not easy to see then you may wish to use the "T" key to highlight them instead of the connected items.
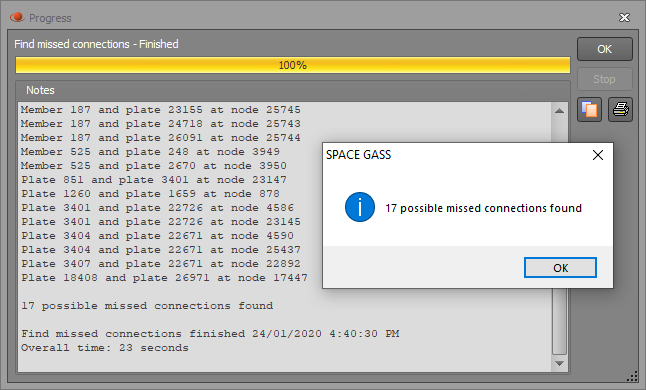
Find missed connections
This mode is selected by default if you start the check connectivity tool without having selected anything first. After clicking Ok in the form that appears it scans the model for any nodes that fall close (within the tolerance distance) to members or plates without being connected to them. At the end of the search it generates a report for you to copy or print, plus it selects all the nodes that may be involved in possible missed connections. You are also given the option of creating a filter that contains all the selected nodes.
If you want to re-select the nodes found in the last search without re-running the full search then you can select the "Use previous search results" option.
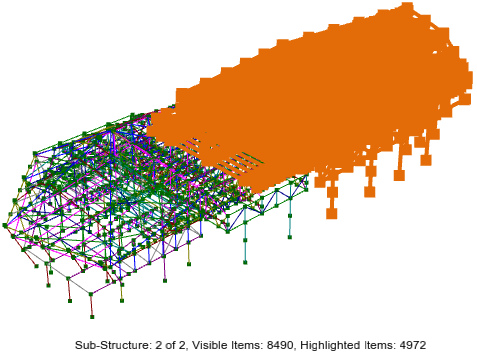
Find sub-structures
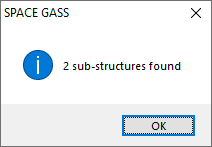
This mode requires you to right-click on a node, member or plate and then select "Check Connectivity" => "Sub-Structures" from the popup menu that appears. It will then find all the sub-structures in your model and highlight the one that is connected to the item you selected. Each sub-structure is a self contained part of the overall model with no connection to the rest of the model. Normally your model will consist of just one sub-structure and so if more than one sub-structure is found then this could indicate that not everything is connected properly.
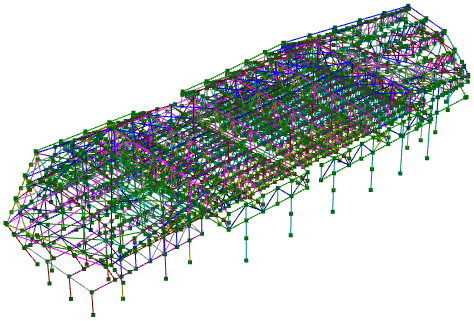
For example, two sub-structures have been found in the following model.
After clicking Ok, the first sub-structure is highlighted together with an information line underneath that shows how many items are visible (nodes, members and plates) and how many are highlighted (ie. how many are part of the first sub-structure).
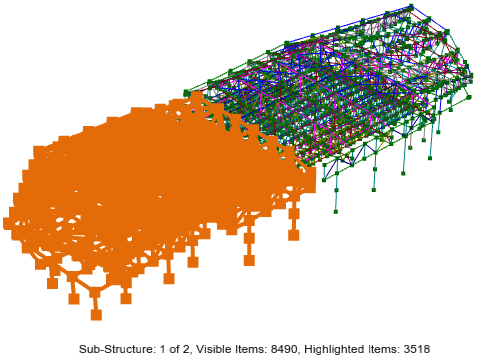
You can then use the keyboard up/down arrow keys to scroll to the next/previous sub-structure or you can type a sub-structure number to go directly to it. Alternatively, you can click on a node, member or plate to highlight the sub-structure that it belongs to. You can also press the keyboard "T" key to toggle the highlighting to what is not highlighted.
Master-slave constraint connections
If you tick the "Include master-slave constraint connections" then it will also include master-slave links as connections, otherwise they will be ignored.