Taper/haunch generation
The Taper/Haunch generation tool lets you model tapered members with or without haunches.
A member can be tapered by varying its depth, width or both depth and width. If the depth is varied, the taper can be applied to the top of the member, the bottom of the member, or evenly to both the top and bottom. If the width is varied, the taper is applied evenly to both sides of the member. If a haunch is selected, its depth is varied and is applied to the bottom of the haunch only.
SPACE GASS uses a series of prismatic member segments to approximate the exact taper. You can use up to 50 segments per taper, however usually 3 segments is enough to get very close to the exact solution. The cross section dimensions for each prismatic member can be set equal to the taper’s largest end dimensions, smallest end dimensions or average dimensions for the segment under consideration.
After selecting the members to be tapered or haunched, right-click and select "Member Tools" => "Generate Taper/Haunch" from the popup menu that appears. If you have selected more than one member then they must be a continuous run of members with no gaps in-between. Each selected member will become a segment of the total taper or haunch. Alternatively, if you have selected just one member then it will be subdivided as part of the taper/haunch process.
The member that you select first determines the start of the taper/haunch. If there was only one member then the node A end will be the start of the taper/haunch. If you selected the members using a selection window or if you selected an intermediate member first, the start of the taper/haunch will be at the end with the lowest numbered member.
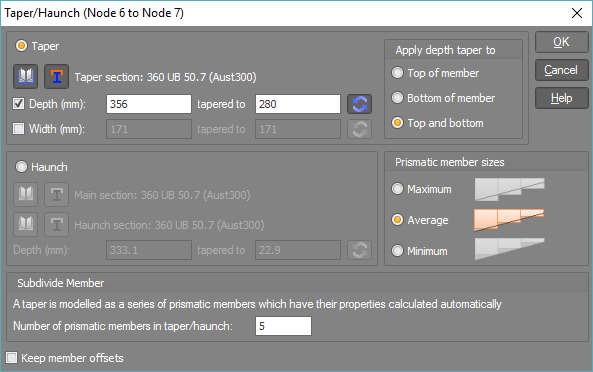
The following form shows an example of generating a taper.
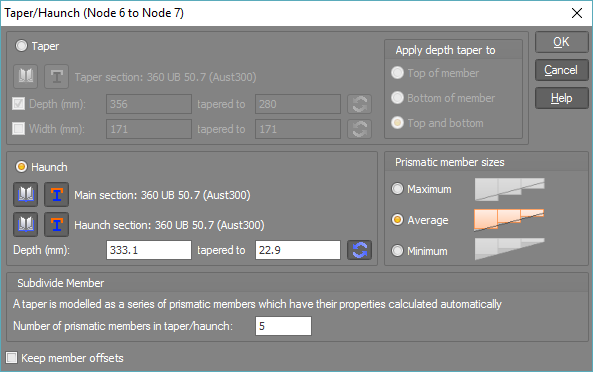
The following form shows an example of generating a haunch.
Note that whenever a taper or haunch is generated, member offsets are also calculated and applied to the tapered/haunched members. The offsets take into account the changed centroid location in the built-up sections and ensure that the tapered/haunched members are correctly positioned relative to each other.
If you applying a taper or haunch to members that have already been tapered or haunched then you should generally untick the "Keep member offsets" option so that the offsets are not doubled up.