Click here to
download the latest Titan server program and save it to your desktop.
When
the download is complete, double-click the downloaded file to install
it. Follow the installation prompts and accept the default settings
for each step until the installation is complete.
If
the Titan system has not yet been registered, the following Titan
Registration form will appear. Note
that if the Titan Administration tool simply opens without first displaying
the form below then it has already been registered and you can close
it and then proceed with the SPACE GASS installation as described
below. If the installer does not display this form, you can access
it by clicking Start Button => All Programs => Titan Licence
Manager => Administration Tool
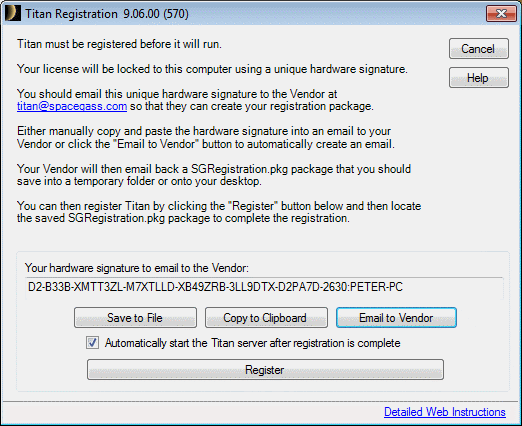
Request
a SPACE GASS registration package by emailing the hardware signature
from the above form to admin@spacegass.com.
This is not an automated service and so please also include your business
name and contact details in the email so that you can be identified!
When
you receive the SPACE GASS registration package by return email, save
it to your desktop and then click the "Register"
button in the above form to register your Titan server. If
you have closed the Titan Registration form then just open it again
as per step 3 above.
Once
registered, the Titan Administration tool will open as shown below,
and automatically start the Titan licence manager. You should check
that a green tick appears above the "Start
Titan" button near the bottom-right corner of the tool.
If it is a red cross then click the "Start
Titan" button and, when the green tick appears, you can
close the tool.

You should now proceed with the "SPACE GASS Installation" procedure for each computer that you want to run SPACE GASS on.