Attachment and alignment methods
The following discussion applies to all tools that involve selecting points or drawing vectors, such as when drawing nodes, members or plates, moving, stretching, copying, extending, connecting or even when adding dimensions. During these operations there are a number of aligning, snapping and attachment tools that can help.
To attach to a node (or the end of a member or the vertex of a plate), just move close to the node until it changes color. This indicates that you are close enough, and you can then click the left mouse button to attach to it.
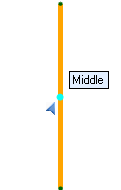
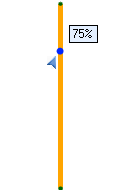
To attach to an intermediate point on a member, just move close to the member until it changes color. You can then move along the member to find its mid-point, third points, quarter points or fifth points, each of which will show up as a different colored dot with a label next to it. You can then click to attach to the desired point.
Note that if you wish to position a point close to a node or member without attaching to it, you can hold down the C key to temporarily turn off the attachment feature.
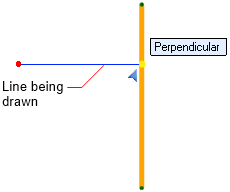
If you are drawing the second end of a line then "Perpendicular" and "Orthogonal" attachment points will also be highlighted on the member if applicable.
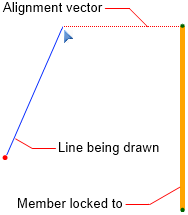
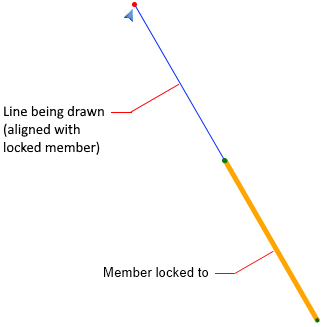
You can even align your point with an orthogonal line extending from a node or a member's midpoint. In order to do this you must first briefly hover over the node or member until you hear a faint pop sound that indicates that you have "locked on" to it. You can then move away and a dotted line will extend from the "locked on" node or member to your point, allowing you to line up with it exactly.
Note that you can temporarily turn off alignment with locked on nodes or members by holding down the A key while you are working. You can also change the "locked on" delay via the "Lock delay" setting in the Attachment and alignment methods Preferences form in the renderer's Settings menu.
Similarly, you can align your point with any of the "locked on" member's three local axes as shown below.

You can even use it to draw a new member that is aligned with an existing member by "locking on" to the existing member and then drawing in line with it.
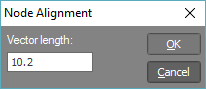
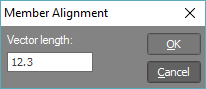
When aligning with a locked on node or member, you can position your point an exact distance from the locked on item by simply typing the distance rather than having to click the point with your mouse.
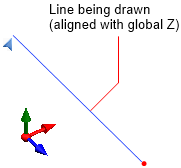
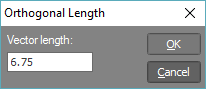
When drawing a line, if it is close to being aligned with one of the three global axes then it will snap to that axis. You can then either click the point with your mouse or you can just type the length of your line.
Note that you can temporarily turn off alignment with a global axis by holding down the A key while you are working.
For information about the grid, snap and working plane tools in the renderer, refer to Grid, Snap and Plane.
For more information about using the keyboard to position points, refer to "Positioning points using the keyboard".
For more information about operating the other tools in the renderer, refer to The graphics window.